Add Employee & Settings
The Account section in iPOS Retail allows the Admin to add employee accounts and set their data access permissions.
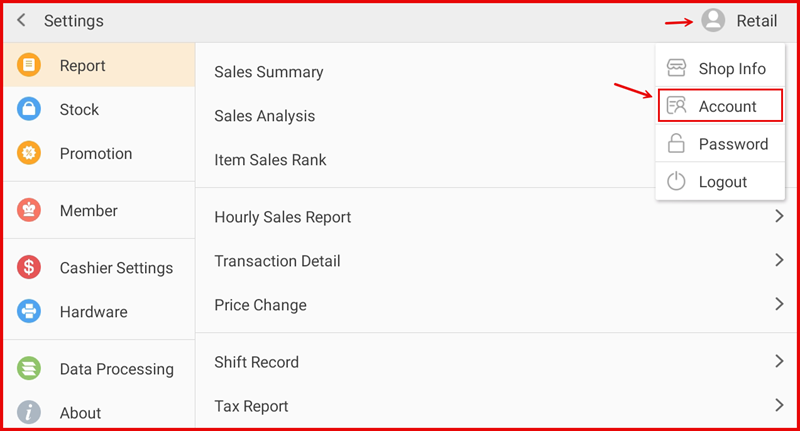
Step 1: Go to Account Settings
From the Settings screen, tap the Admin profile icon at the top right corner. A dropdown menu will appear — tap Account.
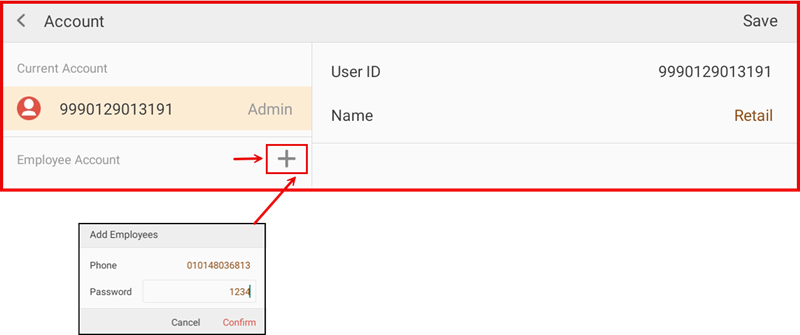
Step 2: Add an Employee Account
The Account screen shows the Current Account (Admin) on the left and the account details on the right. Under Employee Account, tap the + button to add a new employee. An Add Employees form will appear — enter the employee Phone number and Password, then tap Confirm.
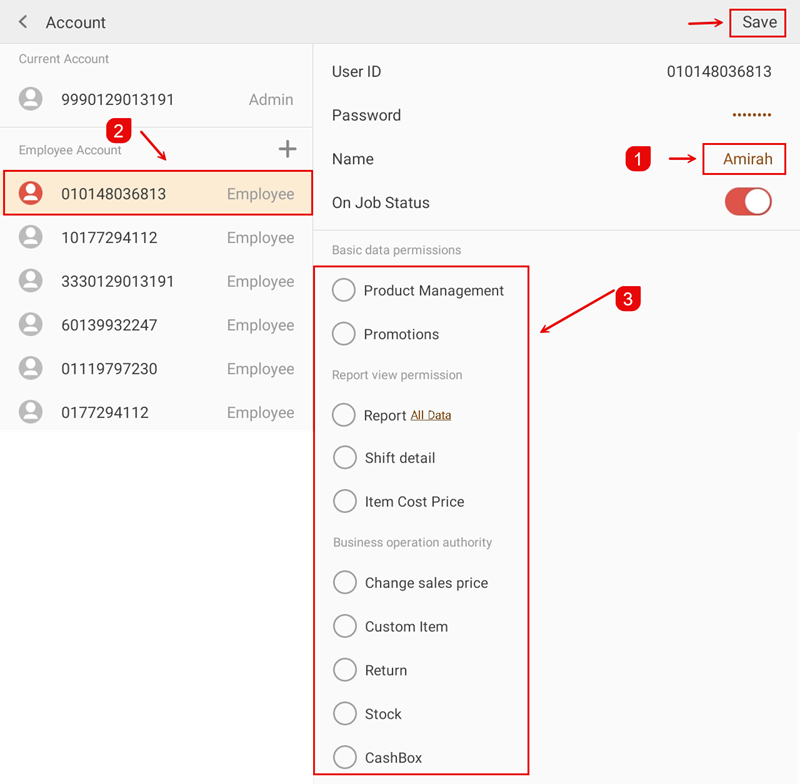
Step 3: Configure Employee Permissions
After adding the employee, select their account ② from the Employee Account list on the left. On the right panel, you can:
- Edit the employee Name ①
- Toggle On Job Status — active/inactive
- Set Basic data permissions ③: Product Management, Promotions
- Set Report view permission: Report (All Data), Shift detail, Item Cost Price
- Set Business operation authority: Change sales price, Custom Item, Return, Stock, CashBox
Tap Save at the top right when done.