Cashier Printer Settings
iPOS Retail supports connecting a cashier printer directly from the POS screen. You can add a printer using Auto Search or Manual method.
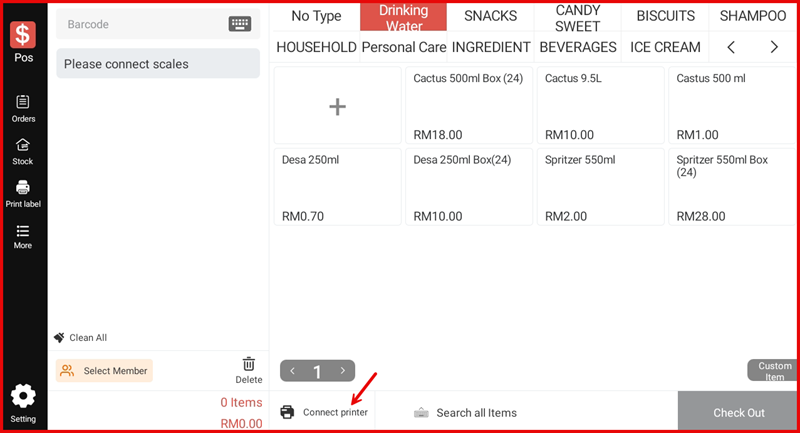
Step 1: Tap "Connect Printer" on POS Screen
On the main POS screen, tap Connect printer at the bottom toolbar to open the printer management screen.
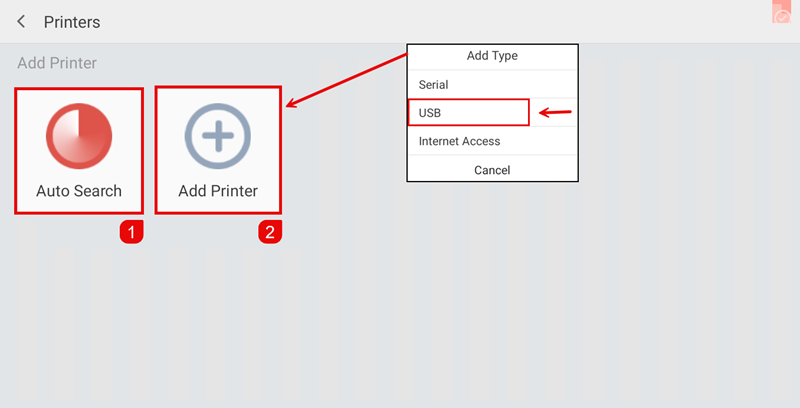
Step 2: Add Printer — Auto Search or Manual
The Printers screen shows two options:
- Auto Search ① — Automatically scans for available printers
- Add Printer ② — Manually add by connection type: Serial, USB, or Internet Access
For USB printers, tap Add Printer and select USB from the Add Type dropdown.
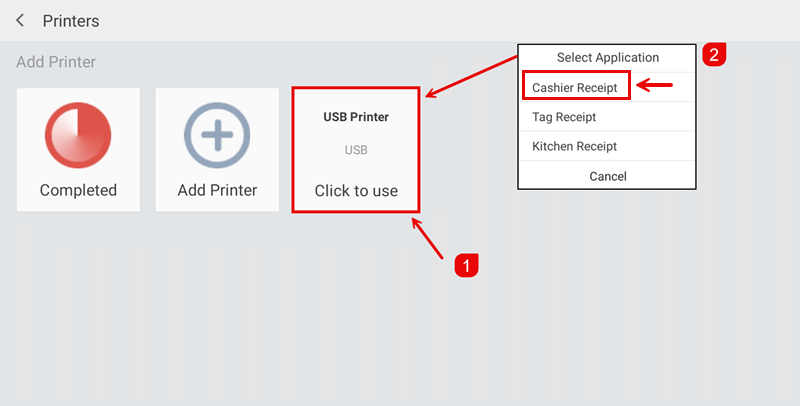
Step 3: Select Printer & Assign Usage
After Auto Search completes, the detected printer appears (e.g. USB Printer). Tap it ① and a Select Application dialog ② will appear. Choose the printer role:
- Cashier Receipt — for customer receipts
- Tag Receipt — for item tag printing
- Kitchen Receipt — for kitchen orders
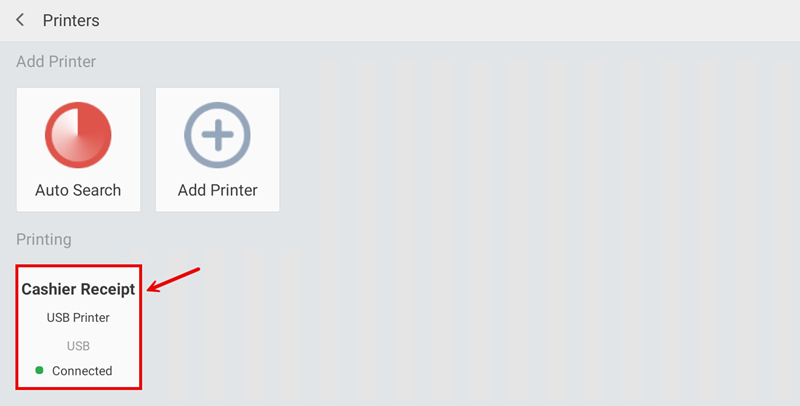
Step 4: Printer Added Successfully
The printer now appears under the Printing section showing the assigned role (Cashier Receipt), printer name (USB Printer), connection type (USB) and status (● Connected).
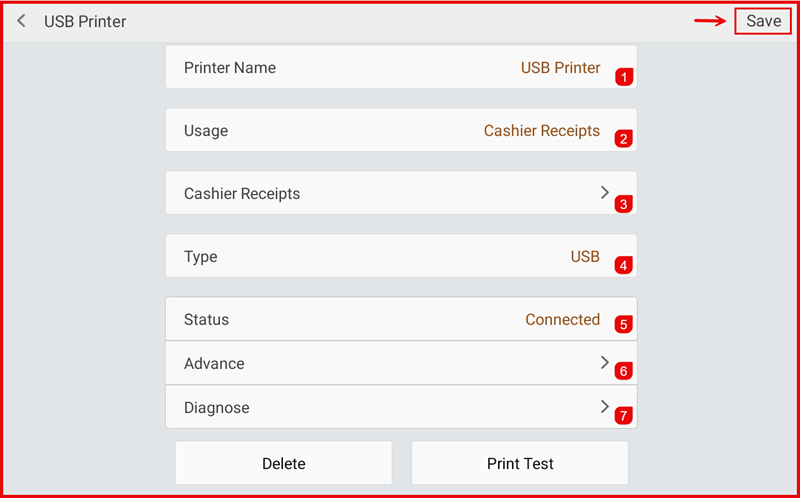
Step 5: Printer Detail Settings
Tap the printer in the Printing section to open its detail settings:
- Printer Name ① — Name of the printer
- Usage ② — Assigned role (e.g. Cashier Receipts)
- Cashier Receipts ③ — Tap to configure receipt layout settings
- Type ④ — Connection type (e.g. USB)
- Status ⑤ — Connection status (Connected)
- Advance ⑥ — Advanced settings (e.g. Raster bitmap printing)
- Diagnose ⑦ — Run printer diagnostic tests
Tap Delete to remove the printer or Print Test to print a test page. Tap Save to apply changes.
Step 6: Printer Connected on POS
Once the printer is configured, the Connect printer button on the POS screen changes to a green ● Print indicator, confirming the printer is connected and ready.