Label Printer Settings
This guide explains how to configure label templates and print item price labels using the Print Label module in iPOS Retail.
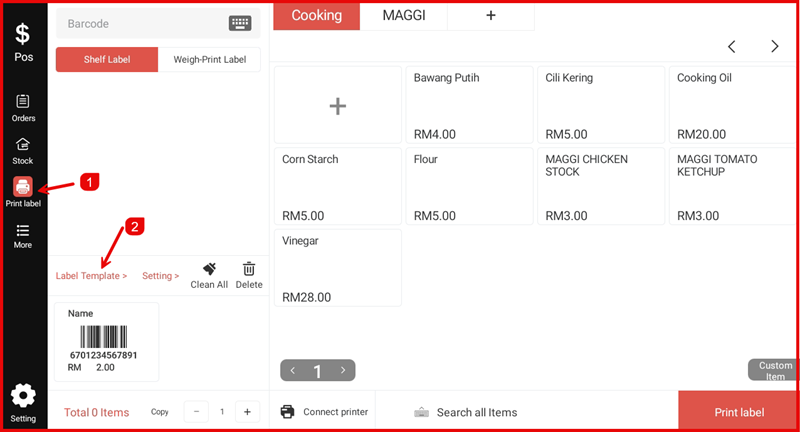
Step 1: Open Print Label
Tap the Print Label icon on the left sidebar to open the Print Label module. You will see the item list on the right and the label controls on the left, including the Label Template and Setting links.
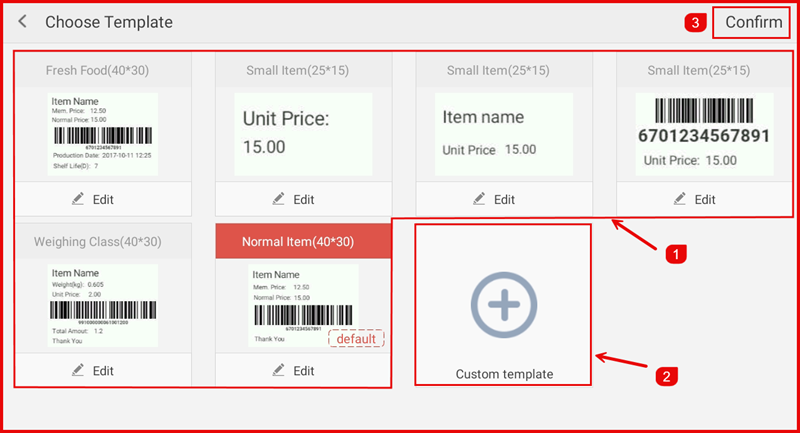
Step 2: Choose a Label Template
Tap Label Template > to open the template selection page. Choose from the available built-in templates or tap Custom template to create your own. Tap Confirm to apply the selected template.
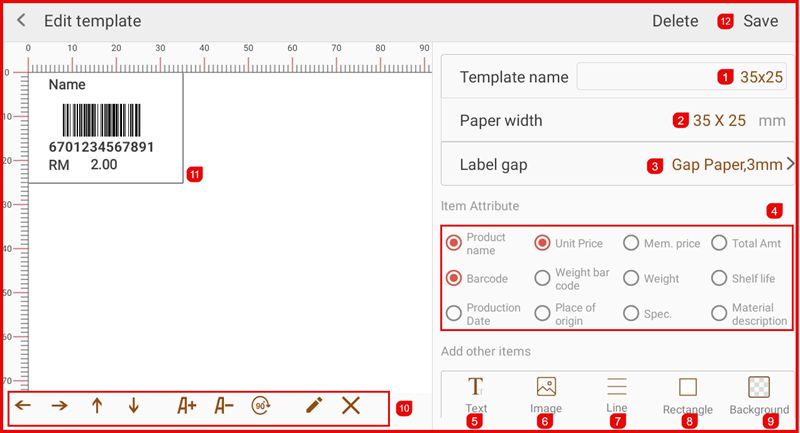
Step 3: Edit a Template (Optional)
Tap Edit on any template to customise it. You can set the Template name, Paper width, Label gap, and select which Item Attributes (e.g. Product name, Barcode, Unit Price) to display on the label.
Step 4: Set a Default Template
Long-press on any template to bring up the options menu. Tap Setting default template to make it the default template used when printing labels.
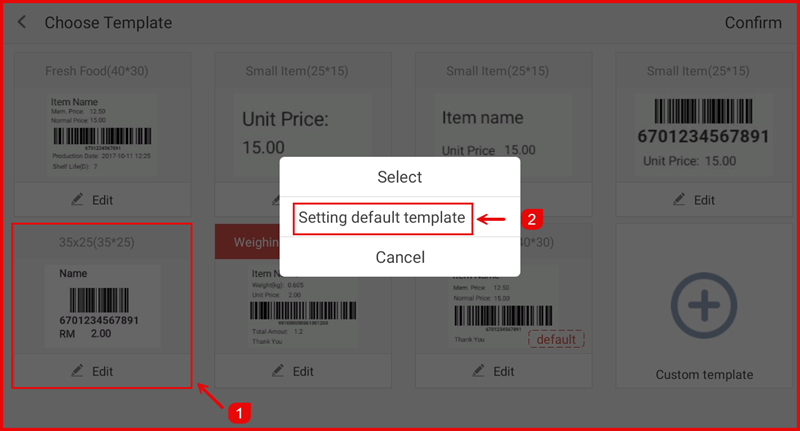
Step 5: Confirm Default Template
The selected template will now show a default badge. Tap Confirm to return to the Print Label page with this template active.

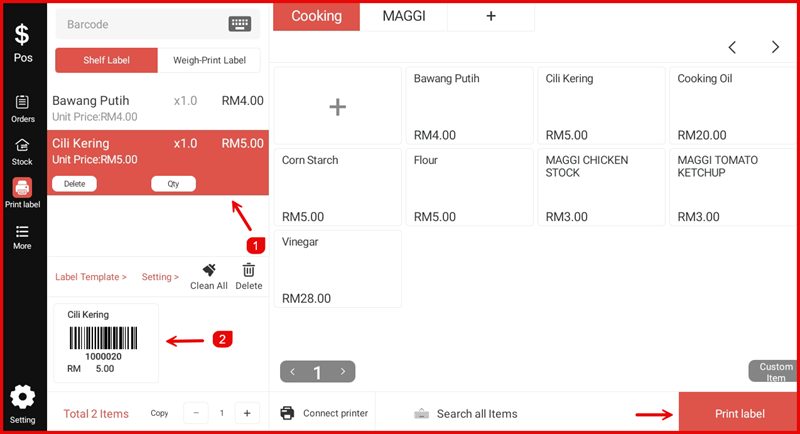
Step 6: Select Items & Print
On the Print Label page, tap items from the item list on the right to add them to the print queue. The label preview will update on the left. Once ready, tap the Print label button to print the labels.