Style Setting Step
The Style Setting in iPOS Retail allows you to customise how items are displayed on the cashier screen, including grid layout, sorting rules, font sizes, and cart behaviour.
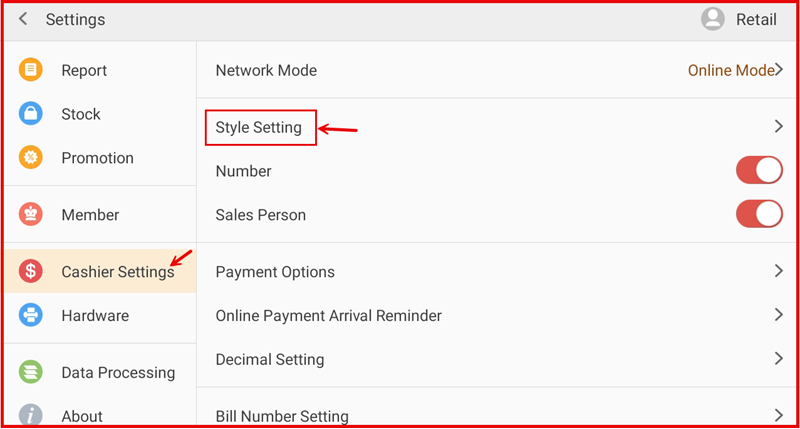
Step 1: Open Style Setting
Go to Settings and tap Cashier Settings from the left sidebar. Then tap Style Setting from the right panel to open the configuration page.
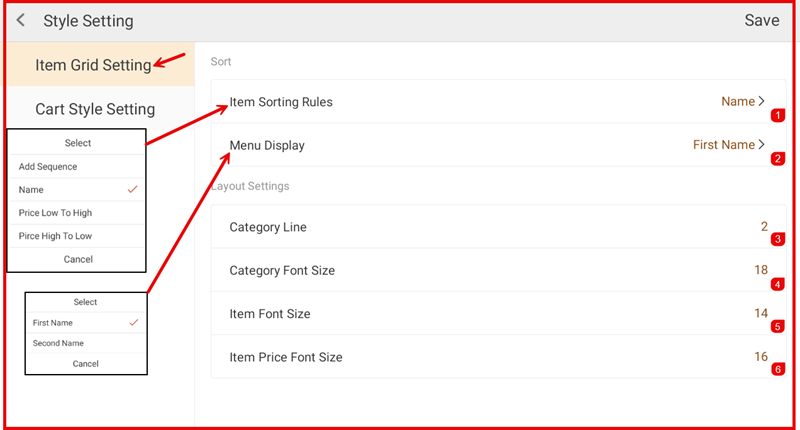
Step 2: Configure Item Grid Setting
Under Item Grid Setting, configure the Sort options on the right panel:
- Item Sorting Rules (①) — Choose how items are sorted: by Name, Add Sequence, Price Low to High, or Price High to Low.
- Menu Display (②) — Choose how item names are displayed: First Name or Second Name.
Under Layout Settings, adjust the display sizes:
- Category Line (③) — Number of category rows displayed.
- Category Font Size (④) — Font size for category labels.
- Item Font Size (⑤) — Font size for item names.
- Item Price Font Size (⑥) — Font size for item prices.
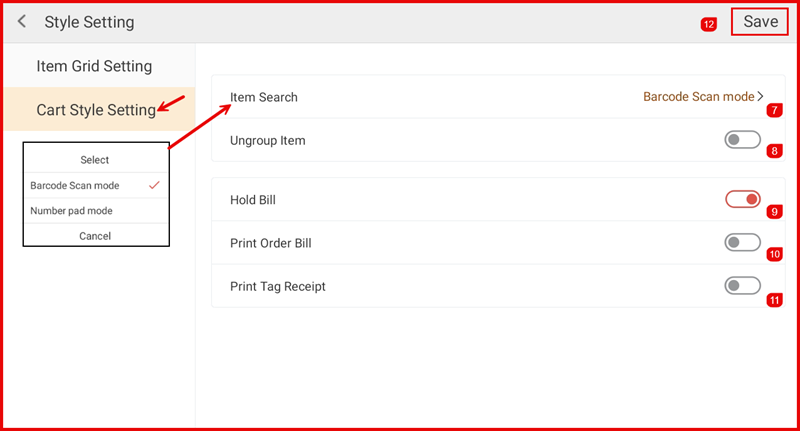
Step 3: Configure Cart Style Setting
Tap Cart Style Setting to configure the cart behaviour options:
- Item Search (⑦) — Choose the search mode: Barcode Scan mode (scan barcode to add items) or Number pad mode (enter item number manually).
- Ungroup Item (⑧) — Toggle on to display each item line separately instead of grouping identical items.
- Hold Bill (⑨) — Toggle on to enable the hold bill feature, allowing cashiers to suspend a transaction and resume it later.
- Print Order Bill (⑩) — Toggle on to automatically print an order bill after each transaction.
- Print Tag Receipt (⑪) — Toggle on to print a tag receipt for each item sold.
Once all settings are configured, tap Save (⑫) to apply the changes.